Shibuya Sky Photography: Rules, Spots and the Shots That Work
No bags, no hats, no tripods. The rooftop's rules are stricter than almost any deck in Asia, and once you understand why, they stop being an obstacle and start telling you exactly how to shoot up there.
 By Mia Nakamura, licensed Tokyo tour guide based in Shibuya
Short answer
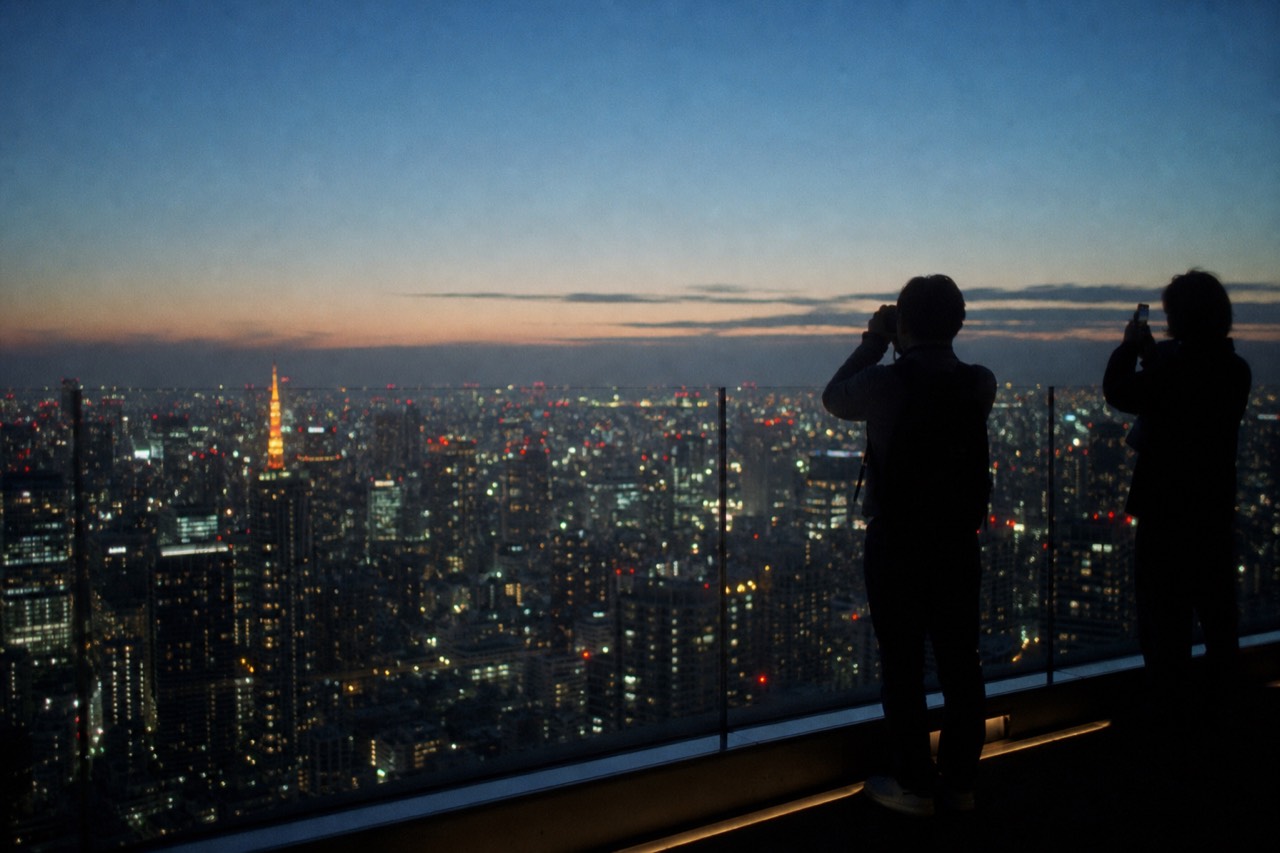
Only a phone or a neck-strap camera goes onto the rooftop. Bags, hats, tripods and selfie sticks all stay in the 100-yen lockers on 46F. The Crossing sits northeast of the Sky Edge corner, blue hour beats full dark for city detail, and the indoor 46F windows are the fallback when wind or rain shuts the roof.
Shoot The Roof Properly
One strap, one coin, and the right slot: the rooftop rewards planning more than gear. The guided night walk adds photo support on the evening half of the calendar.
The thing I take off visitors most often, before we go anywhere near the lift, is a hat. Not because it looks wrong, because it is banned, and the reason is sitting 229 metres below in the form of a pedestrian crossing that carries a quarter of a million people a day. Anything that can leave your hands on an open roof at that height becomes a projectile, and the rule list up there is written accordingly.
That single constraint shapes every photograph taken on the Sky Stage. You cannot brace a tripod, you cannot hang a second body off your shoulder, and you cannot dig a lens cloth out of a bag pocket, because the bag is in a locker two floors down. What you can do is shoot handheld, with one device, at a height and in an open air that almost nothing else in central Tokyo offers. The best pictures from that roof are all made by people who planned around the restriction instead of arguing with it.
What can you actually carry onto the Shibuya Sky rooftop?
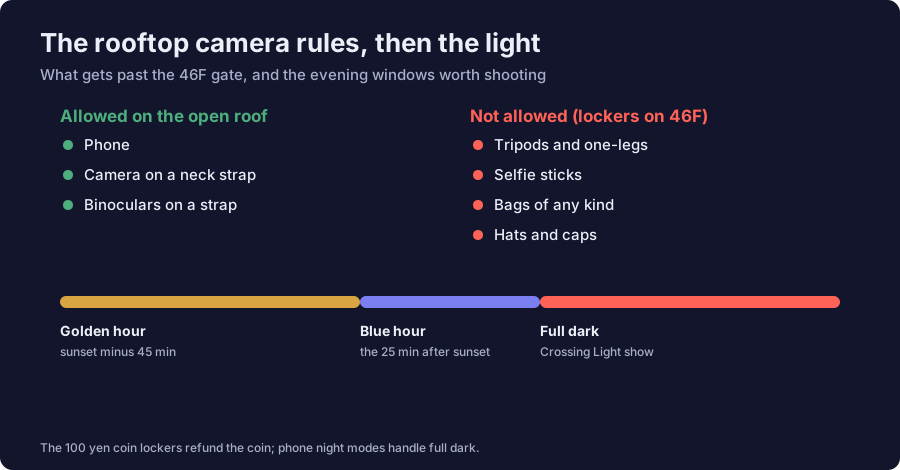
Phones and neck-strap or pocket cameras only. Bags of any kind, backpacks, pouches, hats and caps, tripods, monopods, selfie sticks, food, drink and earphones are all barred from the open Sky Stage. Everything goes into 100-yen coin-return lockers on 46F, with station lockers available for suitcases.
The list is not advisory and staff enforce it at the gate to the roof, so arriving with a camera bag is a delay rather than a debate. Read it once before you travel and pack accordingly, because the version of this that ruins an evening is the person who brought a 70 to 200 lens, a tripod and a bucket hat, and now spends fifteen minutes of a timed slot working out what to do with them. The current rules sit on the official frequently asked questions page and they are updated when the operator changes them.
Neck straps are the operative detail for anyone with a real camera. A camera on a strap around your neck is allowed; the same camera in your hand with no strap is a problem, and a strap wound round your wrist is not the same thing. Pocket binoculars on a strap are also fine, which is a genuinely useful thing to know if you are up there hunting for the mountain on the western horizon rather than shooting the city.
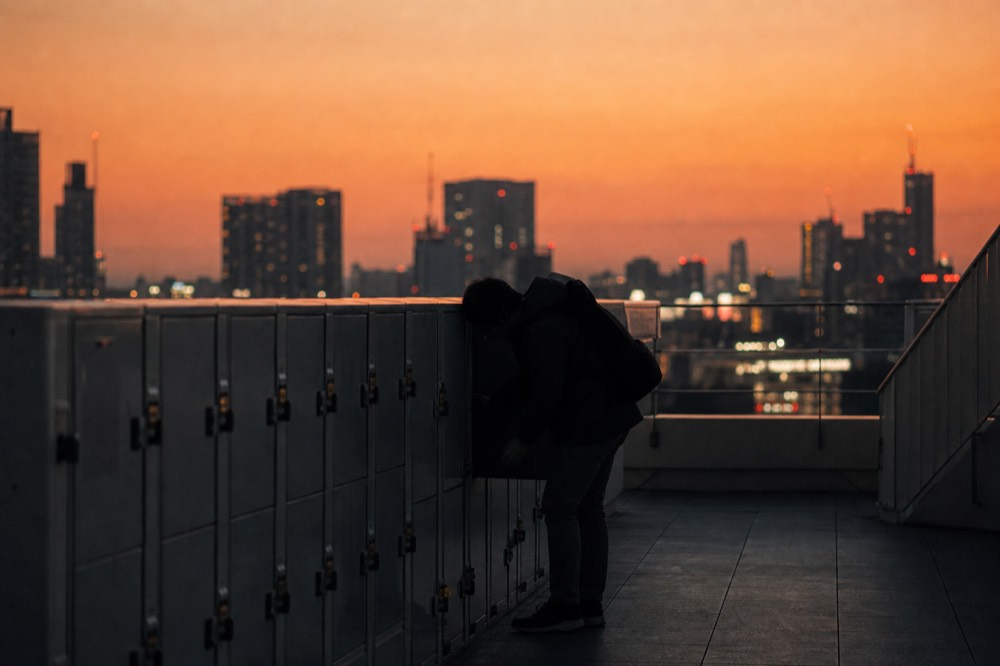
Lockers are the small logistical puzzle. The 46F lockers take a 100-yen coin and return it, so you need one coin in your pocket rather than a card. If you are arriving straight off a train with a suitcase, use the station lockers before you go up, because the 46F lockers are not sized for luggage and the queue for them at a busy sunset slot is its own little bottleneck.
| Item | Rooftop Sky Stage | Indoor 46F | Where it goes |
|---|---|---|---|
| Phone | Allowed | Allowed | In your hand |
| Camera on a neck strap | Allowed | Allowed | Around your neck |
| Camera with no strap | Not allowed | Allowed | 46F locker |
| Any bag, backpack or pouch | Not allowed | Allowed | 46F locker, 100-yen coin return |
| Hat or cap | Not allowed | Allowed | 46F locker |
| Tripod, monopod, selfie stick | Not allowed | Not allowed | 46F locker |
| Pocket binoculars on a strap | Allowed | Allowed | Around your neck |
| Food, drink, earphones | Not allowed | Bar service on 46F | 46F locker |
| Suitcase | Not allowed | Not allowed | Station lockers, before you arrive |
Where can I get the best view of Shibuya Crossing?
From directly above at street level plus 229 m, which only the rooftop gives you, or from one of three low viewpoints that look across the crossing rather than down on it: Mag's Park on the Magnet by Shibuya 109 roof, the second-floor window seats at the Tsutaya building Starbucks, and the café floors of the L'Occitane building.
They are not competing for the same photograph, and this is where most advice goes wrong. The low viewpoints are two to three storeys up and roughly level with the crossing, which is the angle that produces the famous image: the crowd converging as a mass, faces and umbrellas readable, the neon walls of the buildings framing the frame. That is a street photograph made from a balcony, and it is what people picture when they picture Shibuya.
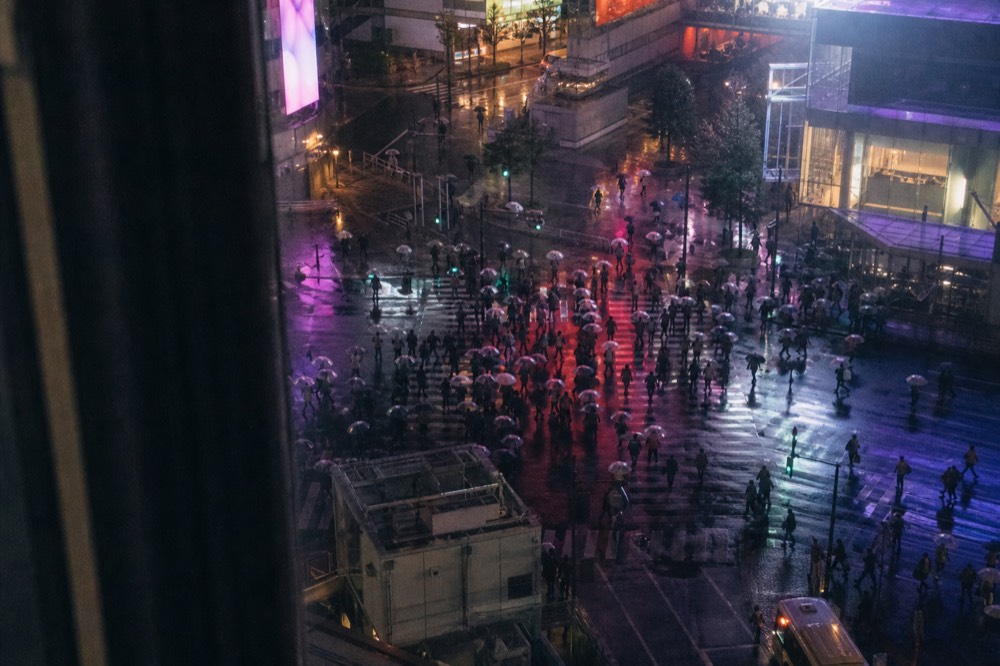
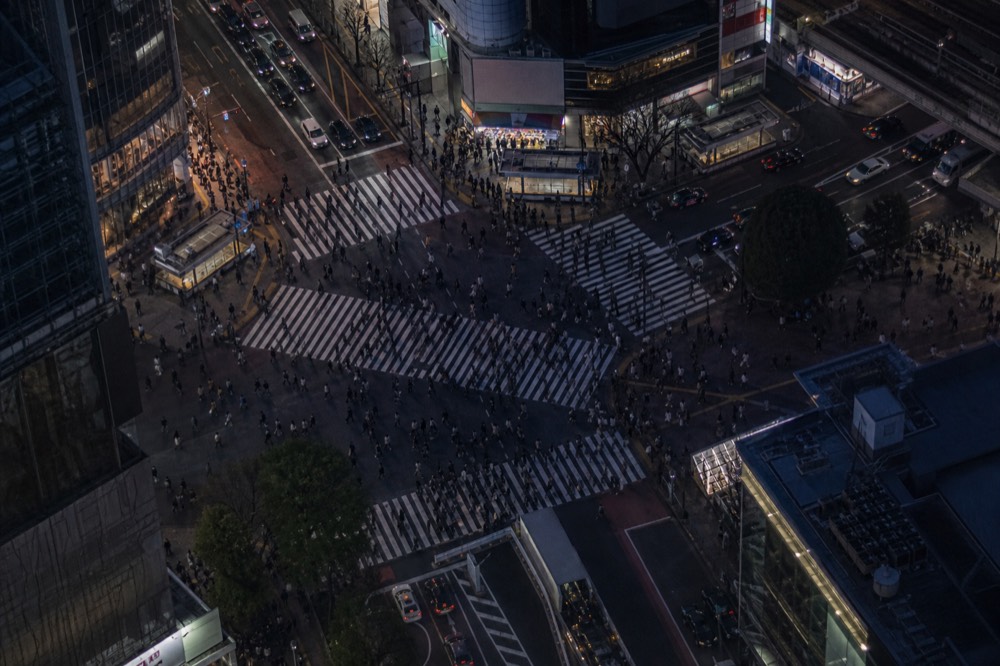
The rooftop gives you the opposite. From 229 m the crossing is an abstraction, a pale X scratched into a circuit board with the station tracks running off it and the whole western half of Tokyo behind. Individual people are not the subject any more; the pattern is. Both are worth having, and the smart plan on a two-night trip is to do the low angle on one evening and the high angle on the other.
Cost separates them more than quality does. Mag's Park is the cheap elevated option and has been the standard free-to-low-cost recommendation for years. The Starbucks window costs the price of a drink and, more expensively, the wait, because those seats are the most contested café seats in Tokyo and there is no reservation system. An independent roundup of crossing viewpoints keeps track of which are currently open, which matters because these spots close and reopen with building work more often than the deck does. For the rooftop version, Shibuya Sky Tickets is the straightforward route, and the district context for all of it sits in the local guide to the district.
| Viewpoint | Height above the crossing | Cost | The angle it gives | The catch |
|---|---|---|---|---|
| SHIBUYA SKY rooftop | 229 m, open air | 2,700 yen before 15:00, 3,400 yen from 15:00 | Straight down, the crossing as a pattern | Timed entry, sells out, strict carry rules |
| 46F indoor windows | About 220 m, behind glass | Same ticket | Same view with a reflection layer | Glass, but it works when the roof shuts |
| Mag's Park rooftop | Roughly 8 floors | Free or a small charge | Elevated but close, crowd still readable | Small deck, gets busy at peak |
| Starbucks window, Tsutaya building | 2nd floor | The price of a drink | The classic eye-level crowd shot | No reservations, long waits for the window |
| L'Occitane café floors | 2nd and 3rd floors | Café prices | Seated, direct sightline, relaxed | Paid, and the angle is narrower |
| Street level, Hachiko side | Ground | Free | Inside the crowd, wide lens work | You are in the picture, not above it |
How do you shoot the Crossing from directly above?
Time it to the light cycle. From the Sky Edge corner you are looking northeast onto a two-minute rhythm: empty road, then a green light that pushes a crowd across in every direction at once, then empty road again. Shoot the middle third of the green, hold still, and let the phone or camera take a short burst.
The mechanics of the intersection do the work if you understand them. All the vehicle lights go red together, all the pedestrian signals go green together, and up to about 3,000 people move at peak. From above, that produces about twenty seconds of maximum density in the centre of the X. Fire too early and the crowd is still in the corners. Fire too late and it has cleared. Watch one full cycle before you take anything, which costs you two minutes and doubles your hit rate.
Two technical notes matter from that height. First, resist digital zoom on a phone: cropping a full-resolution frame afterwards gives a better result than zooming in the moment, and the phone's stabiliser has an easier job at the wide setting. Second, a slightly slower exposure at the busiest moment turns the crowd into motion streaks while the road markings stay sharp, which is a stronger picture than a frozen one. Bracing your forearms against the parapet is the only stabilisation you are allowed, so use it.
Sky Edge itself runs on etiquette rather than on a system, and it is worth knowing that before you arrive with a plan. There is no official queue mechanism at the corner and no per-group time limit, but visitors regularly report waits of fifteen minutes or more at peak, and the line that forms is self-organising and quietly strict. The convention that works: join at the back, take your frames in a couple of minutes rather than running a shoot, and step aside to review them somewhere else. People who stand at the corner scrolling through what they just took are the reason the queue moves slowly, and the roof notices. If a busy corner sounds like the wrong use of a timed slot, an evening built around a guided walk that ends up there tends to arrive off-peak, and you can compare a plain admission slot against the current dates before choosing which shape of evening you want.
The vertical composition is the one most people miss. Shot in portrait orientation from the corner, you can stack the crossing at the bottom, the station and the tower cluster in the middle and the sky at the top, which reads as depth rather than as a flat map. Landscape framing from 229 m tends to flatten everything into texture. If you want the crossing to be the subject rather than a detail, go vertical and get lower on the glass.
| Moment in the light cycle | What is happening below | What to shoot |
|---|---|---|
| Red for pedestrians | Traffic flowing, crowds banking on the corners | The empty X, the road markings, the queue mass |
| First seconds of green | Crowd steps off from all sides | Wide, showing the convergence starting |
| Middle of green | Peak density, up to about 3,000 people | The signature frame, burst mode, brace hard |
| Last seconds of green | Stragglers, gaps opening | Slower exposure for motion streaks |
| Back to red | Road clears in seconds | Reset, check the frame, wipe the lens |
How do you deal with the glass parapet and reflections?
Get the lens as close to the glass as you safely can and shade it with your other hand. Reflections happen because there is light behind you and a gap in front of your lens. Closing that gap removes almost all of it. On the open sections of the roof, look for the gaps where there is no glass in the line at all.
Sky Edge is a glass corner, and glass is what makes the drop survivable and the photograph tricky. At night the deck lighting behind you and the phone screen in your hand both bounce back at you, which is why so many rooftop pictures have a ghost of the photographer floating over the city. Pressing the lens barrel almost to the pane, then cupping your free hand around it, kills the ghost in a second without any equipment at all.
Wear the right thing and half the problem disappears before you start. Dark clothing reflects far less than white or bright colours, and a white jacket at the glass will show up as a pale smear in every frame you take at night. This is the one piece of preparation nobody mentions and it is free. Take off anything reflective around your neck too, since a bright lanyard sits at exactly the height that lands in the frame.
The open sections are the other half of the answer, and people forget they exist. Not every metre of that perimeter is glazed to eye height, so walk the full circuit once before you settle anywhere. Where the parapet drops below your lens there is nothing between the camera and the city at all, and a frame taken through open air at 229 m has a clarity that no amount of technique recovers from behind a pane. Those spots are also, predictably, where the wind is loudest.
The glass itself is not perfectly clean and cannot be, because thousands of people press against it every day. Look through your viewfinder or screen before you compose and move a metre if you see smears, rather than trying to fix it in the picture. And check the state of the parapet on the day: the deck's outdoor sections vary in how much clear glass sits at eye height, so if one panel is bad, the next one along usually is not.
| Reflection problem | What causes it | The fix, with no equipment |
|---|---|---|
| Ghost of yourself in the frame | Gap between lens and glass, light behind you | Lens almost touching the pane, free hand cupped around it |
| Pale smear across the city | Bright or white clothing bouncing off the glass | Wear dark colours after dark |
| Bright blobs in the sky area | Deck lighting reflecting on the pane | Shift a metre along, change your angle to the glass |
| Soft, low-contrast image | Smeared or fingerprinted glass | Move to a cleaner panel, wipe your own lens |
| Halos around lights | Phone screen brightness on the inside of the glass | Dim the screen, shield it with your body |
| Double image of neon signs | Shooting at an angle through thick glass | Square up to the pane, shoot straight through it |
Which entry slot gives you the light you want?
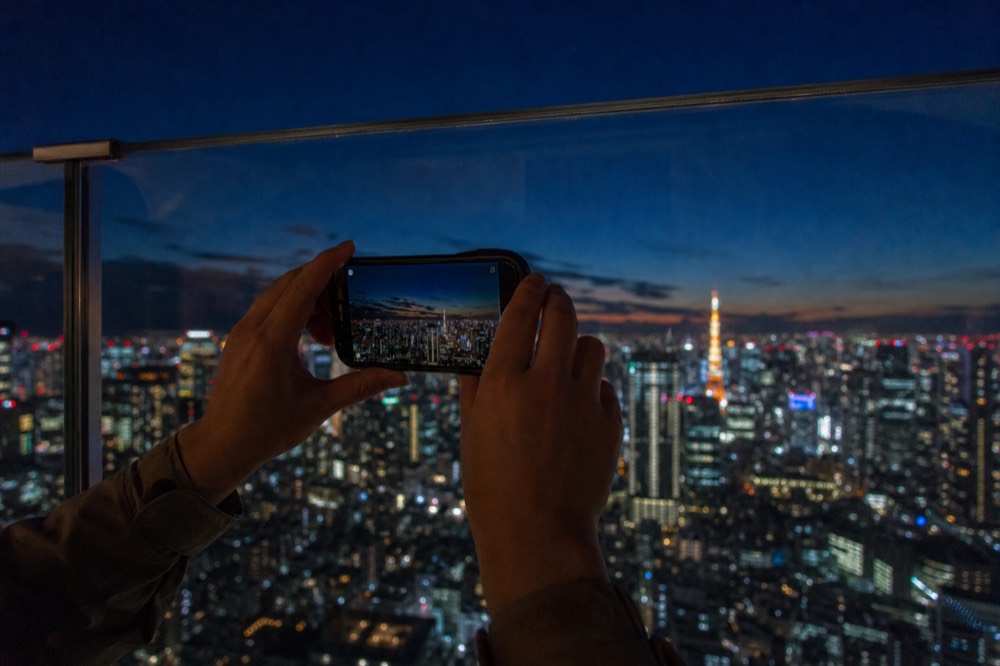
Three slots produce three different pictures. Golden hour gives warm side light on the buildings and a visible horizon. Blue hour, the twenty to forty minutes after the sun goes down, is the strongest for the city because the sky still holds colour while the lights are on. Full dark gives pure neon and the deepest contrast.
Blue hour is the answer for most people and it is the one that gets missed, because visitors book a sunset slot, watch the sun go down, get cold and leave twenty minutes before the best light of the evening arrives. The window where the sky is a deep saturated blue and the streetlights are already burning is short and it is when the city looks most like the photographs that made you want to come. Stay for it. Nothing on your ticket forces you off the roof at a fixed time.
Timing that requires a bit of arithmetic, because Tokyo sunset moves by more than two hours across the year. In December the sun is down before 16:45 and blue hour is finished by around 17:20; in June the sun sets close to 19:00 and blue hour runs to nearly 19:40. Check the sunset table for Tokyo against your date, then book an entry roughly forty-five to sixty minutes before it, which gives you daylight, the sunset itself and the blue window on one ticket. The month-by-month version of this calculation lives in the sunset timing guide.
Worth being honest about the trade. Sunset and blue-hour slots are the most contested on the calendar and disappear fastest, and the roof is at its busiest then, which means the Sky Edge corner is queued. A full-dark slot at 20:00 costs the same as any other after-15:00 entry, has far fewer people on it, and gives you a genuinely excellent neon photograph. If you value space over sky colour, take the later slot. Either way, check which evening slots still have space before you build a day around one.
| Slot | The light | What it is best for | What you lose |
|---|---|---|---|
| Two hours before sunset | Flat daylight, longest sightlines | The mountain on the western horizon, the layout of the city | No colour in the sky, no neon |
| Golden hour | Warm side light on the towers | Portraits, the buildings with texture and shadow | The crossing below is still dull grey |
| Sunset itself | Backlit horizon, strong colour | The wide western view, silhouettes | Heavy contrast, the city below goes dark |
| Blue hour, 20 to 40 min after | Deep blue sky plus city lights on | The single best city frame of the evening | Short window, busiest moment on the roof |
| Full dark, 20:00 onward | Pure neon, black sky | The crossing lit up, quieter roof, easy corner access | No sky colour at all |
| Last entry, 21:20 | Late neon, thinnest crowd | Space to work, unhurried framing | Roof time is limited before 22:30 close |
What phone settings work after dark up there?
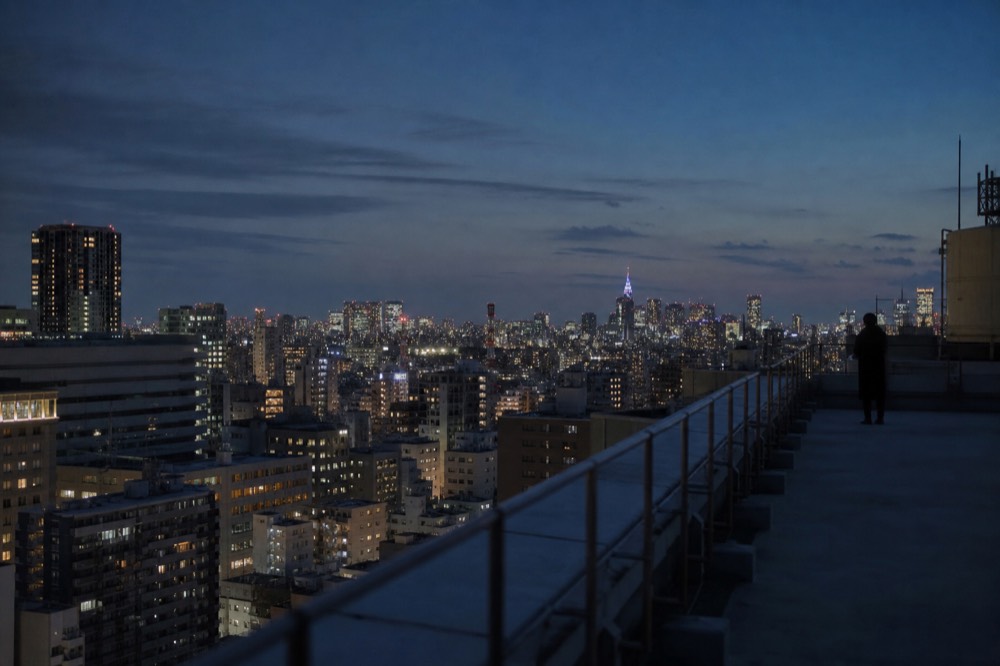
Lock your exposure on the bright part of the city rather than the sky, turn the flash off entirely, brace against the parapet and take short bursts rather than single frames. Night mode helps if you can hold still for its full capture; if you cannot, a normal frame at a wider setting beats a blurred long one.
Phone cameras handle this scene better than most people expect, and the mistakes are consistent. Flash is the first one: at 229 m it lights nothing except the glass in front of you and guarantees a ruined frame, so switch it off before you leave the lift. Automatic exposure is the second, because a phone metering a mostly black scene will overexpose the neon into white blobs. Tap the brightest cluster of lights, watch the frame darken, then lift slightly if the shadows go solid.
Steadiness is your real limit, since tripods are banned. Elbows tucked in, forearms or wrists against the parapet, breathe out and shoot. A burst of five frames handheld will almost always contain one sharp one, where a single frame at the same shutter speed is a coin flip. If your phone has an ultrawide lens, remember it is usually the weakest in low light, so the main lens with a crop afterwards often wins.
Two small habits that improve more pictures than any setting. Wipe the lens before every session, because a phone that has been in a pocket all day through a Tokyo summer has a film on it that turns every light source into a halo. And shoot the same composition twice, once exposed for the sky and once for the ground, if the scene has both. Screens lie about contrast in the dark and you will want the choice later.
| Scene up there | The approach | The common mistake |
|---|---|---|
| The crossing at night | Tap to meter on the lit road, short burst at the peak of the green | Letting auto exposure blow out the signage |
| The wider city | Main lens, brace on the parapet, expose for the light clusters | Using the ultrawide, which is weakest at night |
| Blue-hour skyline | Meter between sky and city, shoot both brighter and darker | Waiting for full dark and losing the blue |
| A person against the view | Steady light on the face from deck lighting, no flash | Flash, which lights only the glass |
| Neon signs and screens | Expose down, let the blacks stay black | Brightening the shadows until the image goes grey |
| Anything through glass | Lens to the pane, hand cupped, dark clothing | Standing back and shooting through the gap |
What can you shoot when the roof is closed?
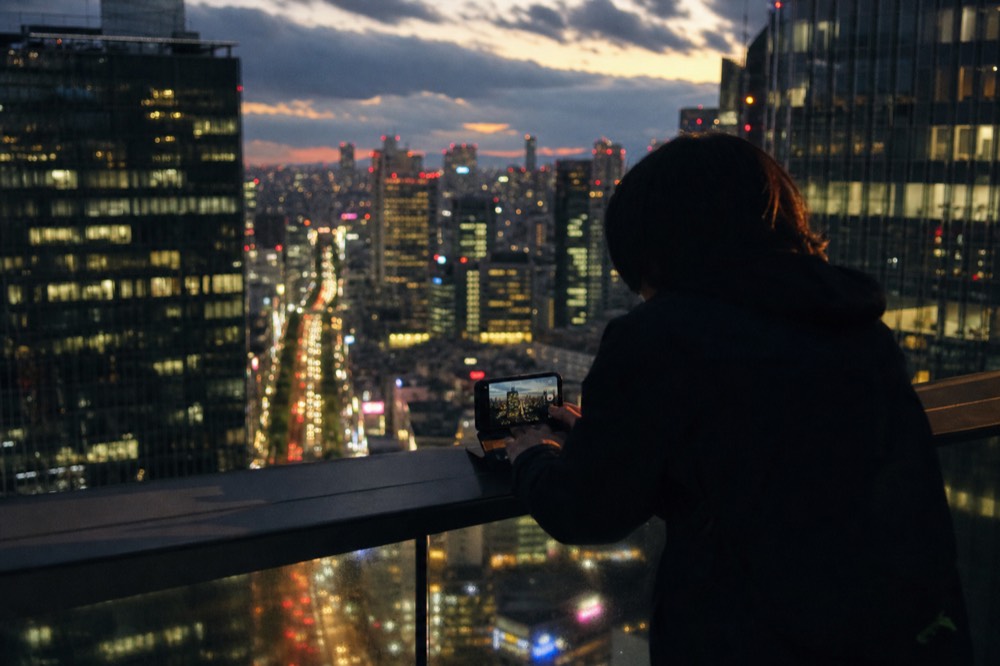
The 46F Sky Gallery, which is indoors, glazed and open when the rooftop is not. Wind, rain, lightning and extreme heat all close the open Sky Stage without notice, and visitors are held on that floor instead. It still gives you the full circuit of directions, digital art installations and a bar, all behind glass.
This happens more often than the marketing suggests, particularly in typhoon season and on hard winter wind days, and it is the single biggest risk to a photography plan built around this building. Refunds apply only before entry, so the decision point is at the gate on 14F, not once you are upstairs. If the forecast is genuinely bad and the mountain or the open-air frame is the whole reason you booked, ask before you go through.
The good news is that 46F is not a consolation prize for pictures. The windows run the full perimeter, the crossing is still below you, and the digital installations up there, including the light and water pieces and the landmark-spotting displays, photograph unusually well because they are designed to be looked at. A wet night with rain streaking the glass and the city smeared behind it is a real photograph, not a failed one, and the reflections you fight on a clear night become the subject instead.
Practically, the same reflection rules apply indoors and matter more, because the interior lighting is brighter than the rooftop's. Lens to the glass, hand cupped, dark clothing, and find the panels away from the art installations where the ambient light is lowest. For the full layout of what sits on each floor and how the ascent works, the walkthrough of the deck itself covers the three zones in order, and how long people actually stay is worth reading if you are planning a long shooting session.
| Condition | Rooftop | 46F indoor | What it means for pictures |
|---|---|---|---|
| Clear and still | Open | Open | Full run of the roof, best case |
| Strong wind | Closed without notice | Open | Glass only, plan for reflections |
| Rain | Closed without notice | Open | Rain on glass, streaked lights, a different image |
| Lightning | Closed without notice | Open | Indoor only, no exceptions |
| Extreme heat | Closed without notice | Open | Air-conditioned, and the haze is bad anyway |
| Any of the above, before entry | Refund possible | Not applicable | Decide at the 14F gate, not upstairs |
What does the Crossing Light show add?
A timed light sequence on the rooftop after dark, run on the Sky Stage itself rather than on the city below. It changes the deck's own lighting rather than the view, which makes it a foreground element: useful for pictures with people in them, largely irrelevant if you are shooting the skyline.
Manage the expectation and you will enjoy it. Visitors sometimes assume the show does something to the crossing far below, and it does not. What it gives a photographer is controlled coloured light on an open roof at night, which is the one thing the venue otherwise lacks, and that turns a silhouette against the city into a lit portrait with the city behind it. If you are travelling with someone and want one good picture of both of you up there, this is the moment to take it.
For the skyline itself, the show is neutral at best. Additional light on the deck means additional reflection on the glass, so if your priority is a clean frame of the city, work the perimeter while the sequence is running and come back to the corner afterwards. The roof is also at its most crowded during the sequence, which is either a problem or an opportunity depending on whether people are in your frame by choice.
The other rooftop feature worth planning around is the seasonal bar on the Sky Stage, which runs from April 29 to December 25 this year with drink-set tickets from 7,000 yen and a strict 20 and over rule. It is a different kind of evening rather than a photography aid, and the reason to mention it here is that it puts furniture and people on part of the roof. If you want the emptiest possible deck for shooting, the seasonal bar months are worth knowing about, and a guided evening that walks the district first can be a better fit than a bare admission slot. You can compare how the sunset entries are priced against the plain ticket before deciding, or browse the evening and sunset options grouped together.
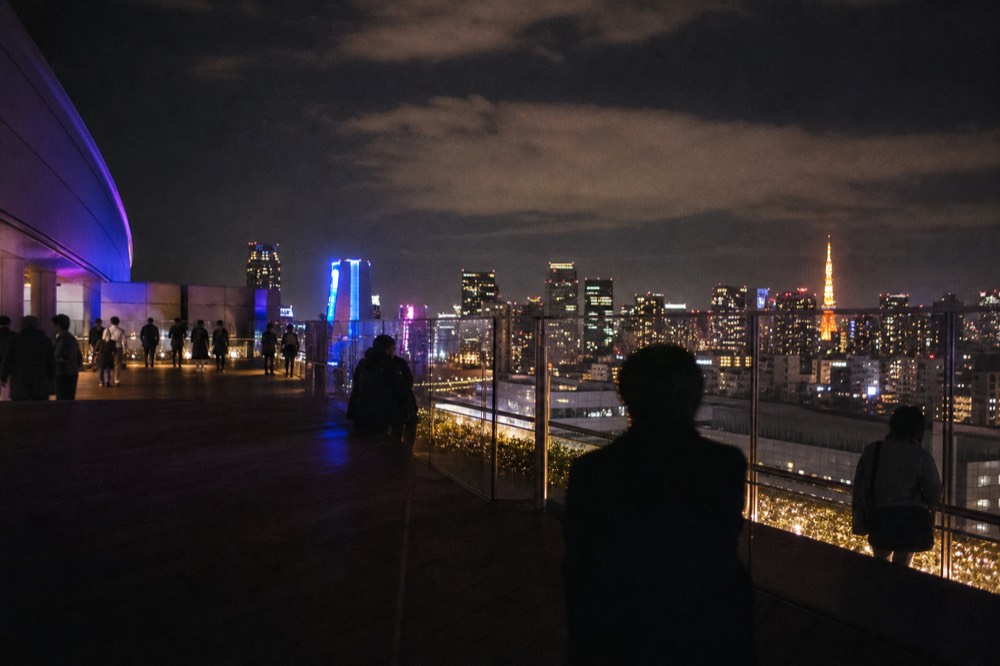
The scramble below has its own reasons for being the most photographed intersection on earth, and why the Crossing became famous covers the numbers and the film history behind it. If you want the raw pedestrian data, the reference entry on the crossing collects the survey figures in one place.
Frequently asked questions
Can you take a camera up to Shibuya Sky?
Yes, if it is on a neck strap or fits in a pocket. Cameras without straps, camera bags, tripods, monopods and selfie sticks are all barred from the open rooftop and go into the 100-yen coin-return lockers on 46F. Phones are allowed everywhere, and neck-strap or pocket binoculars are allowed too.
Are tripods allowed at Shibuya Sky?
No, and this is not negotiable at the gate. Tripods, monopods and selfie sticks are banned from the open Sky Stage on safety grounds, since anything dropped from 229 m lands on a street carrying hundreds of thousands of people a day. Brace against the parapet instead and shoot short bursts rather than long exposures.
What time is best for photos at Shibuya Sky?
Blue hour, the twenty to forty minutes after sunset, when the sky still holds deep colour and the city lights are already on. Book an entry roughly forty-five to sixty minutes before sunset for your date and stay past the sun going down. Full dark from 20:00 is quieter and gives pure neon if you prefer space to sky colour.
Can you photograph Shibuya Crossing from directly above?
Yes, from the rooftop at 229 m, which looks northeast onto the scramble. Time your frames to the middle of the pedestrian green, when up to about 3,000 people are in the intersection at once on a roughly two-minute cycle. Shoot in portrait orientation to stack the crossing, the station and the sky in one frame.
How do you avoid reflections in the glass at Shibuya Sky?
Put the lens almost against the pane and cup your free hand around it to block the light behind you. Wear dark clothing after dark, since a white jacket shows up as a pale smear in every night frame. Dim your phone screen, and move a metre along if a panel is smeared rather than fighting the dirt in the picture.
What happens to your photos if the rooftop is closed?
You shoot the indoor 46F Sky Gallery instead, which stays open when wind, rain, lightning or extreme heat close the Sky Stage. The windows cover the full circuit and the digital art installations photograph well. Refunds apply only before entry, so make the call at the 14F gate rather than after you have gone up.
Your Shibuya Sky Booking Choice
Fit The Way In To Your Trip
Initial recommendation, not personalised. Confirm your party's requirements and dates with the provider.
Have a travel date in mind? Check the night photo walk before arranging the rest of your Tokyo trip.
After-dark Shibuya with photo support: the crossing at full neon, local streets visitors miss, then the deck with someone who knows where skyline frames work.
Deck admission and photo support included; free cancellation up to 24 hours; phone or camera photos, no tripods on the rooftop.
Compare Options And Fit Your Day
- the night photo walk
- After-dark Shibuya with photo support: the crossing at full neon, local streets visitors miss, then the deck with someone who knows where skyline frames work. Deck admission and photo support included; free cancellation up to 24 hours; phone or camera photos, no tripods on the rooftop.
- the held sunset walk
- Holds the hardest ticket of the day for you: a reserved sunset-window entry wrapped in a guided walk as the streets switch from dusk to neon. New listing with a handful of reviews so far; sunset-window deck entry included; free cancellation up to 24 hours; departure timed to sunset year-round.
- the guided crossing walk
- Two hours with a local through Hachiko, the Crossing and Center Gai, finishing with the included trip up the deck to read the district from above. Small-group walk; deck admission included; free cancellation up to 24 hours; meeting point on the listing.